Functions & details
Dealer account
Software features
Point of Sale
Set up account
Set up a merchant account | step by step
Time required: 1-2 minutes
Fundamentals
A dealer account can only be created by Flexvelop. It is therefore necessary for you to contact our sales team. For the final registration, you will receive a confirmation email for the account to your business email address. The account will only be created once you confirm the details by clicking the "Check data" button. You can find everything else you need to know about creating and editing a merchant account under the heading "Setting up an account".
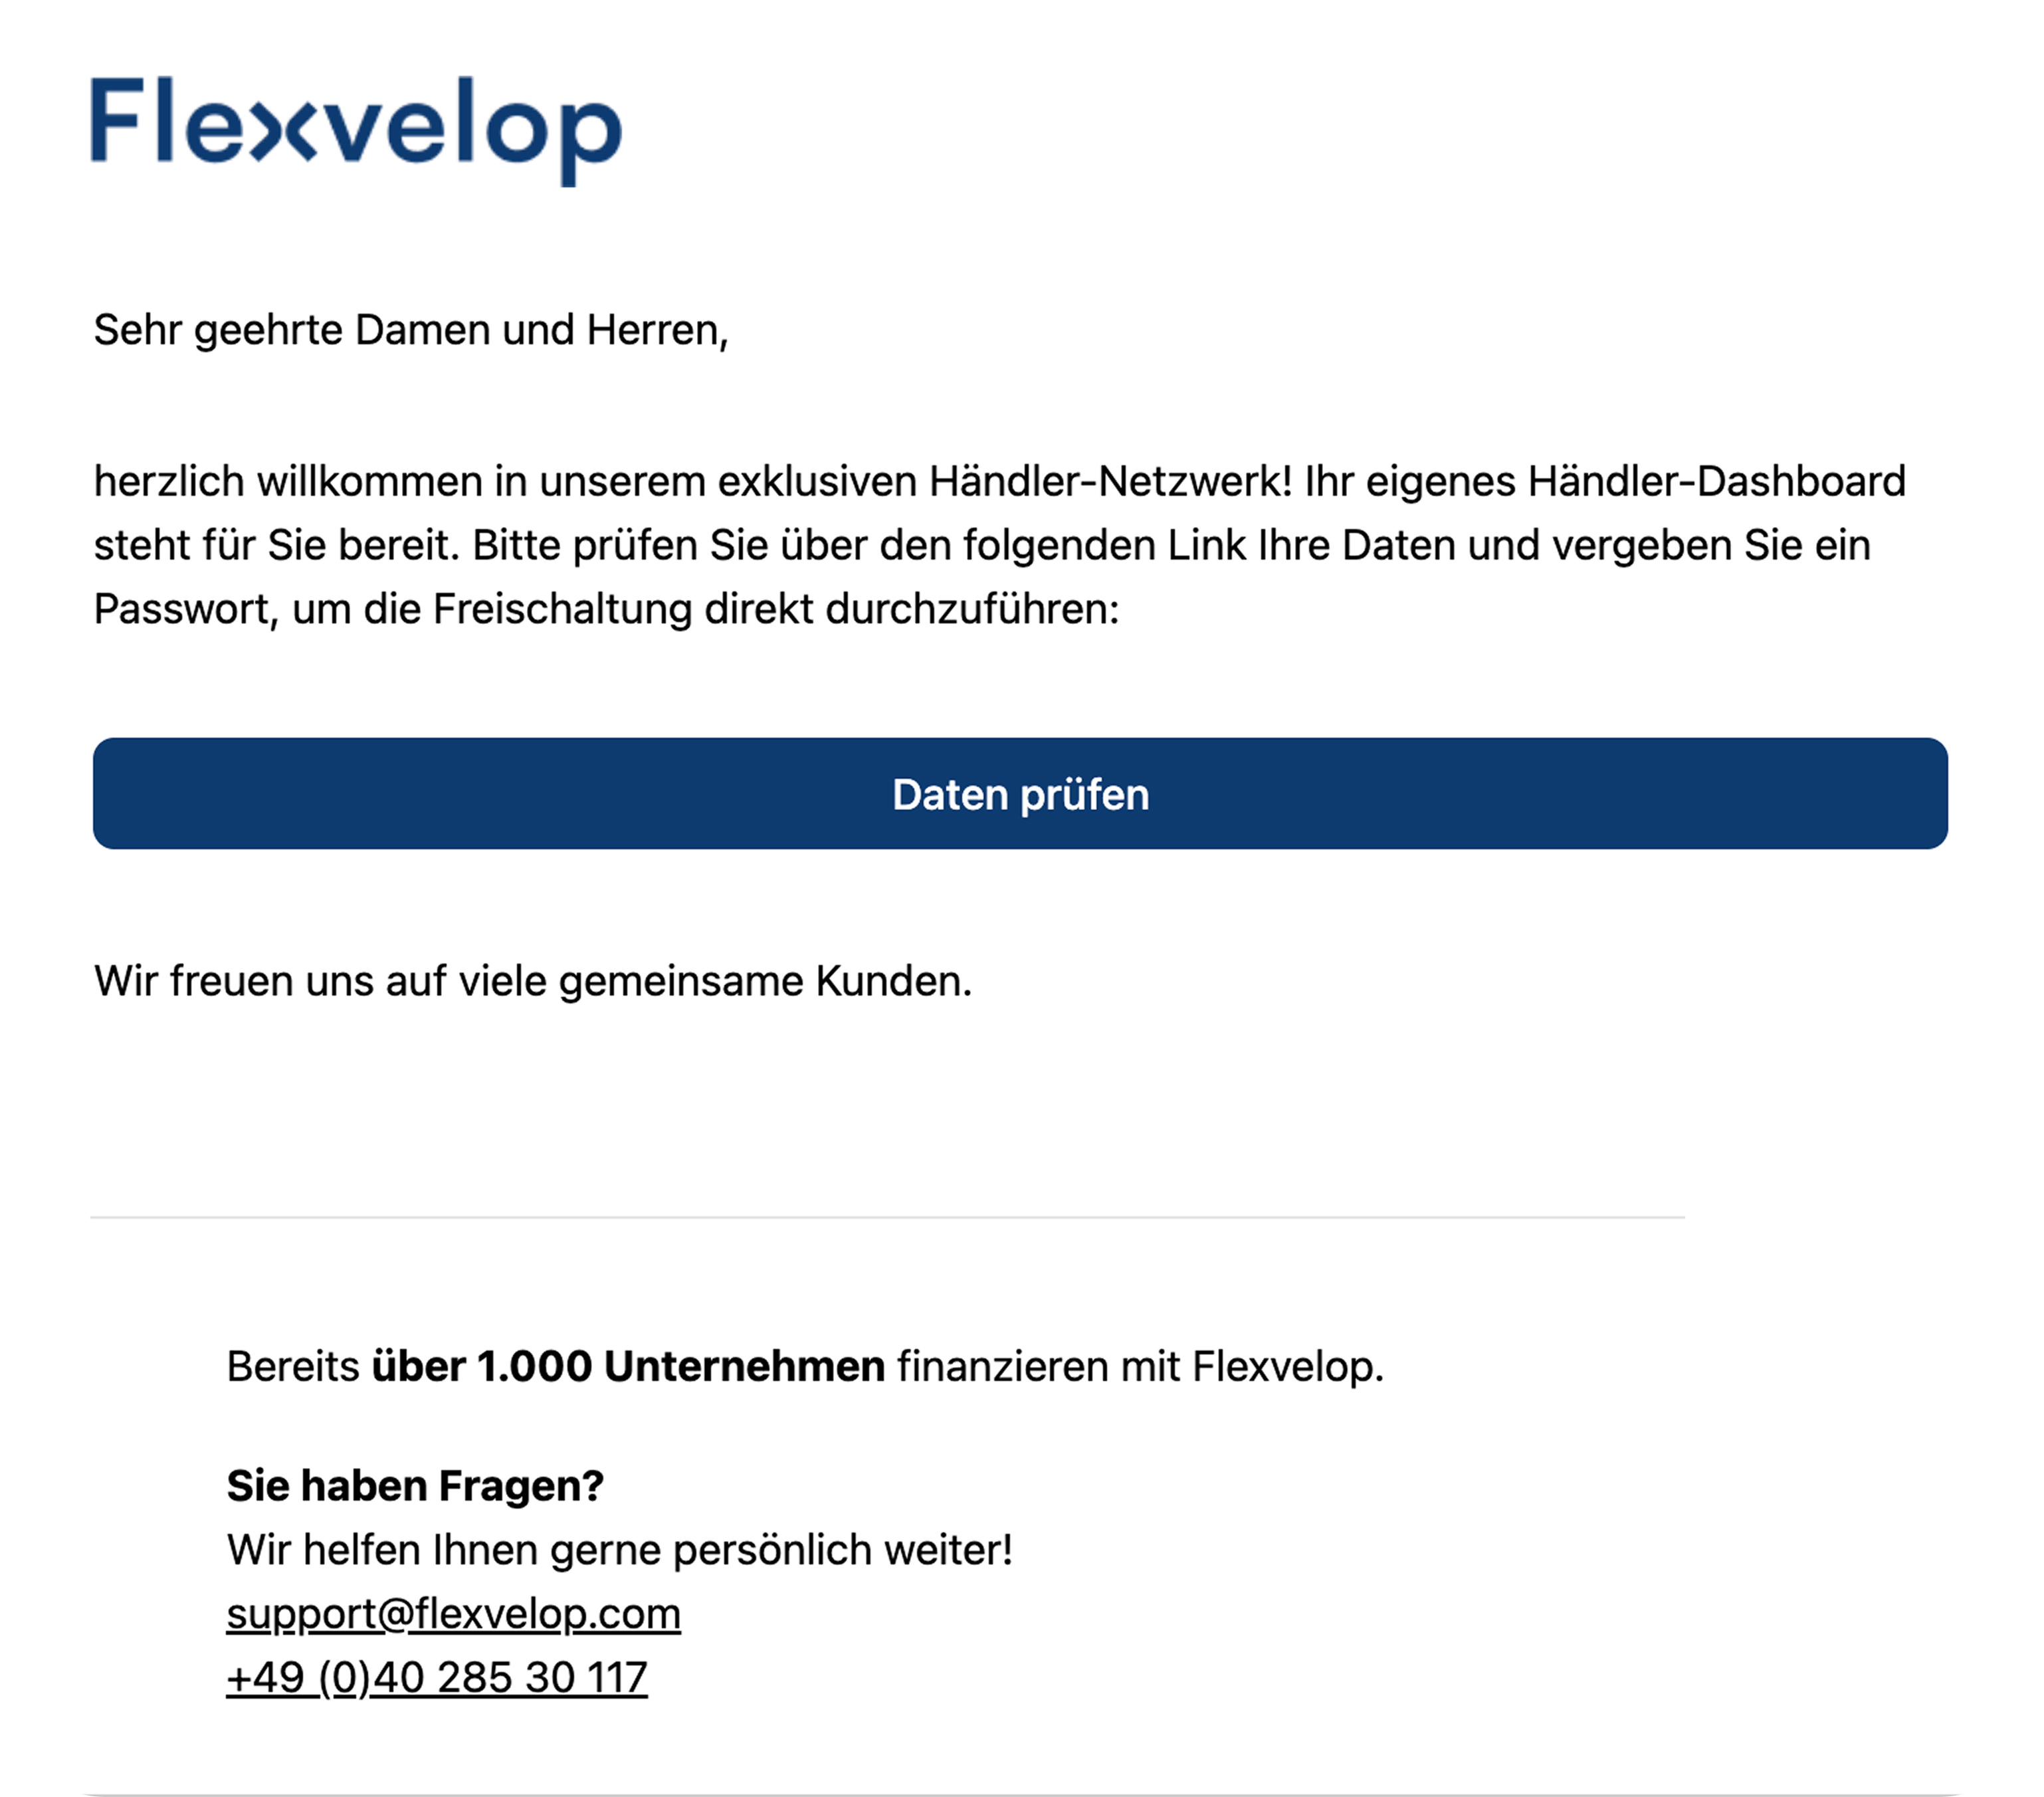
1. e-mail to set up the account
You will receive an email from Flexvelop to set up your account. To continue, click on the "Check data" button. You will be redirected to the software in the browser.
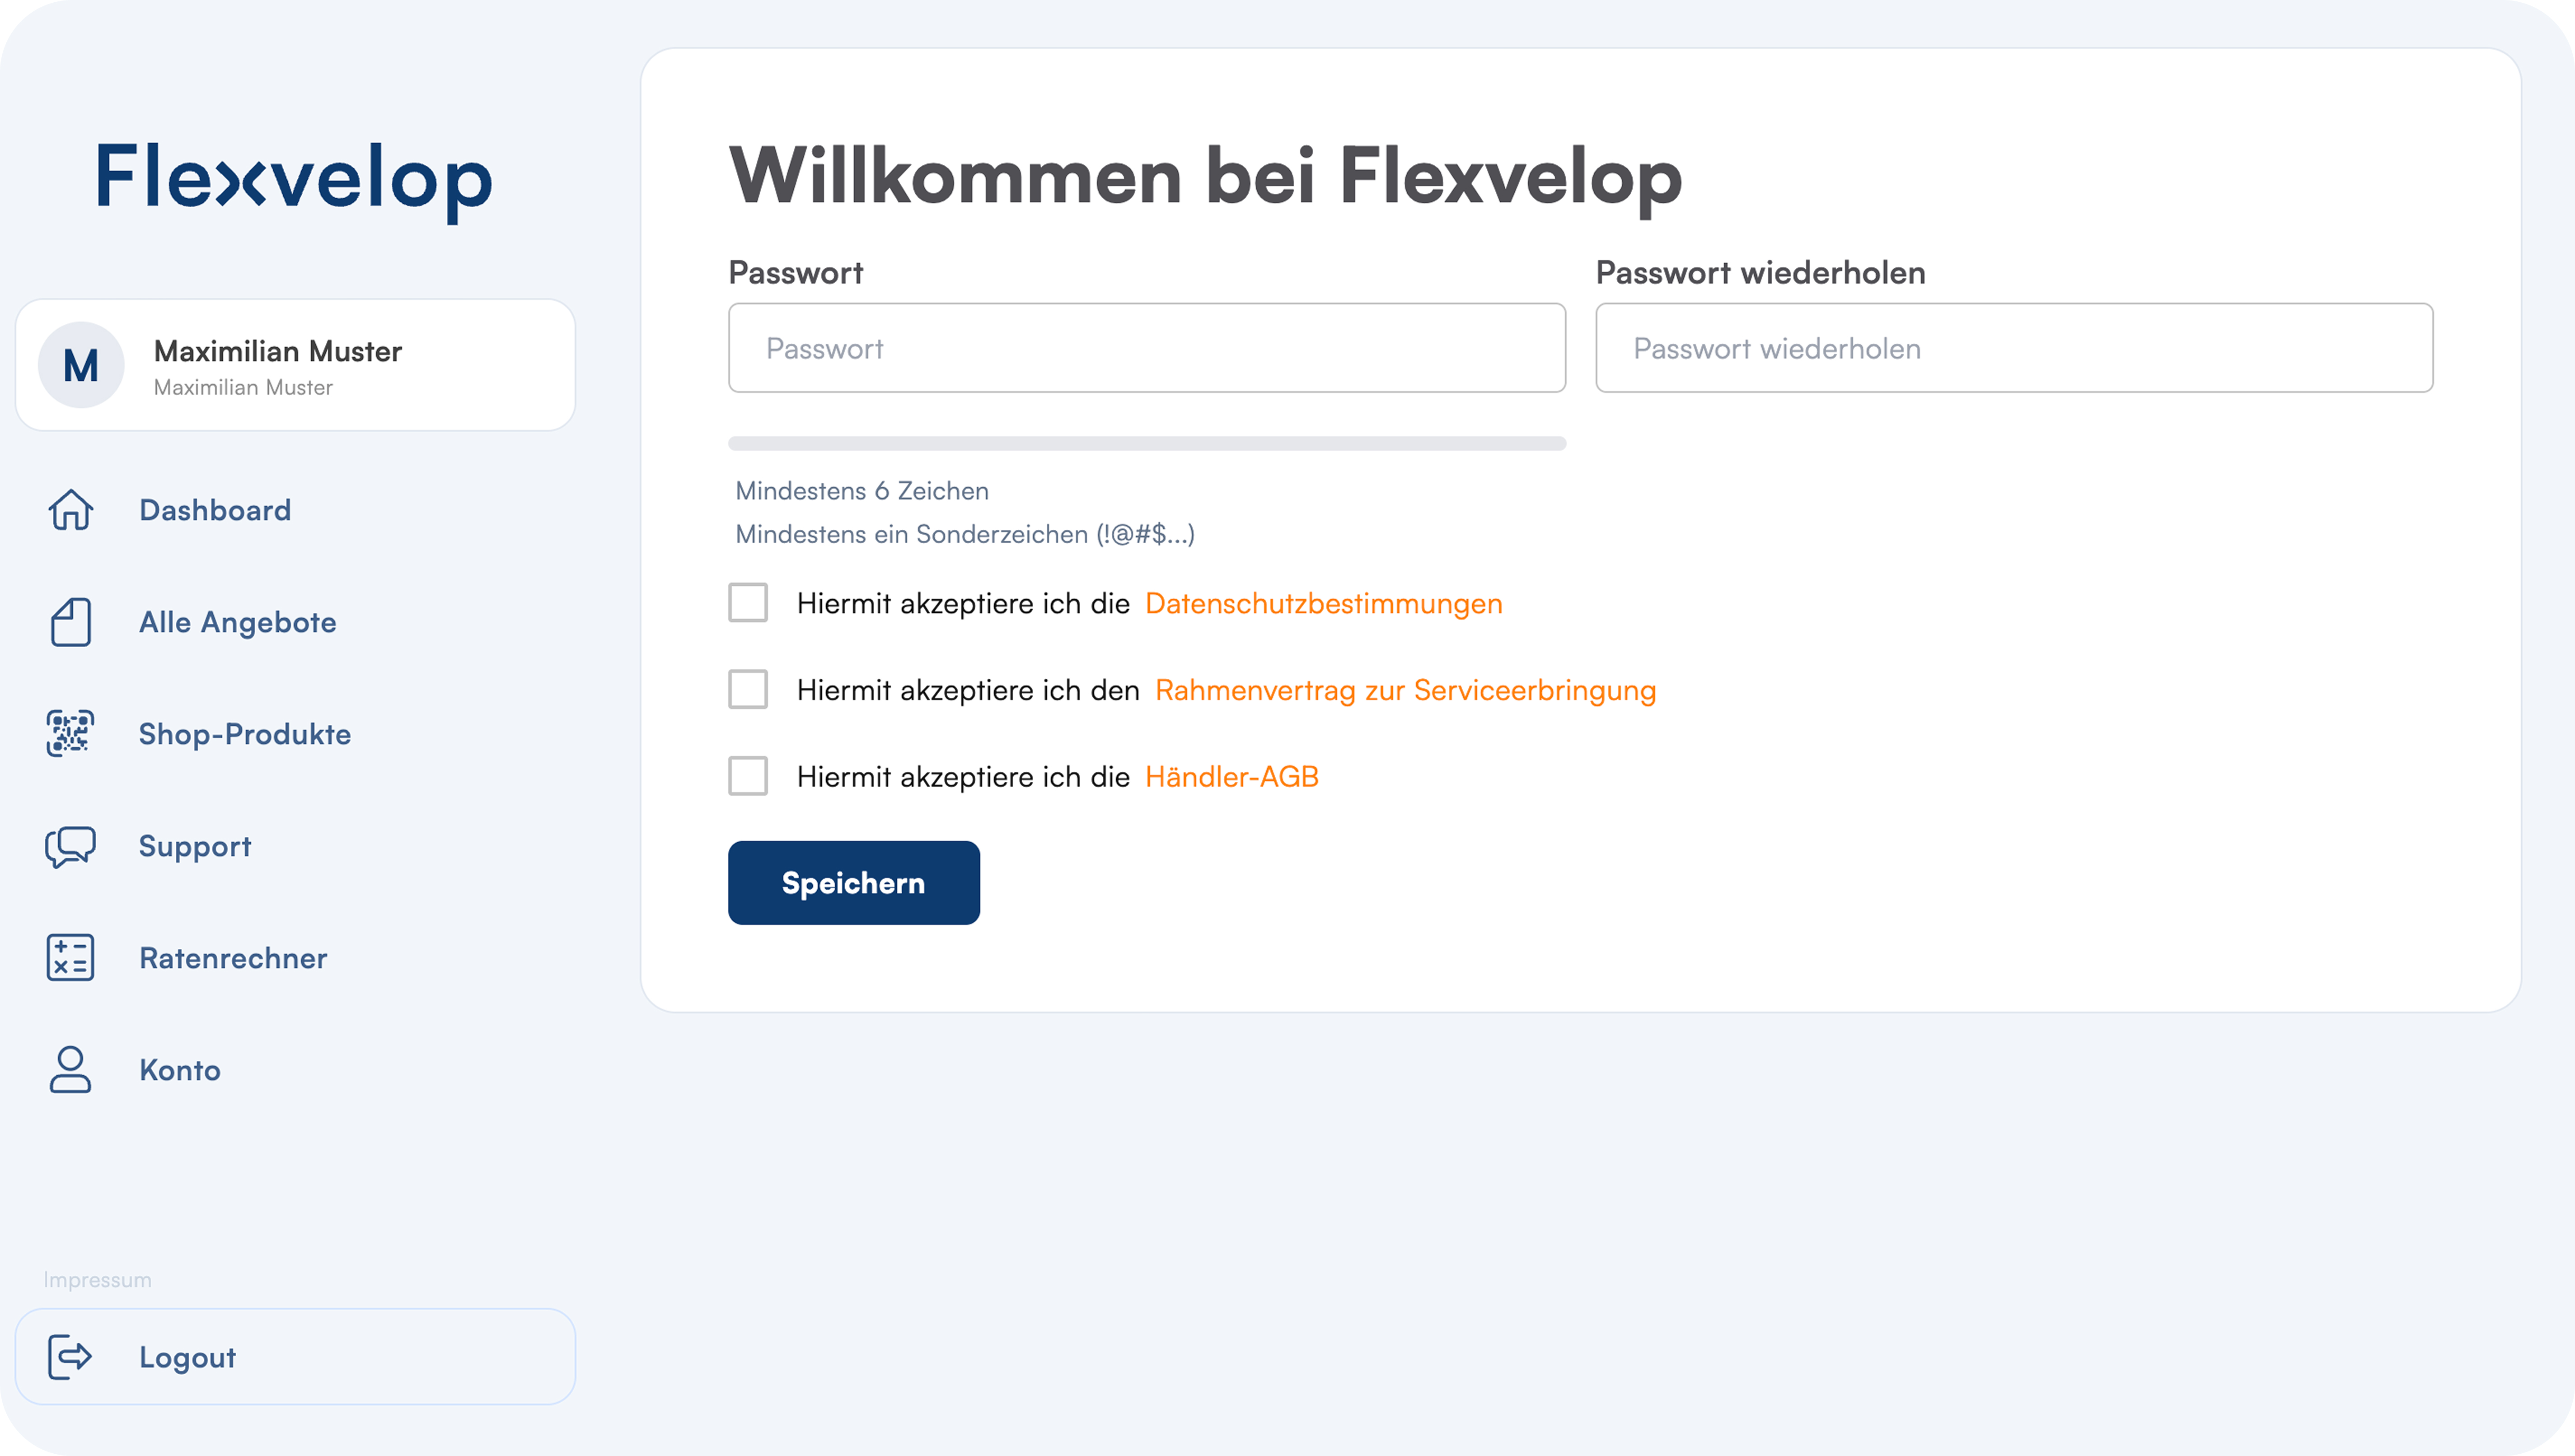
2. set up login data
You are now in the software environment.
You can now create a password for your account. You must also actively agree to the privacy policy and the terms and conditions by clicking on the checkbox.
Please note that the password can be changed afterwards via the settings. There is only one access per account. Be responsible with whom you share your login details.
When creating a merchant account, the data protection provisions and the GTC must be accepted.
The dealer terms and conditions can be viewed during registration and here.
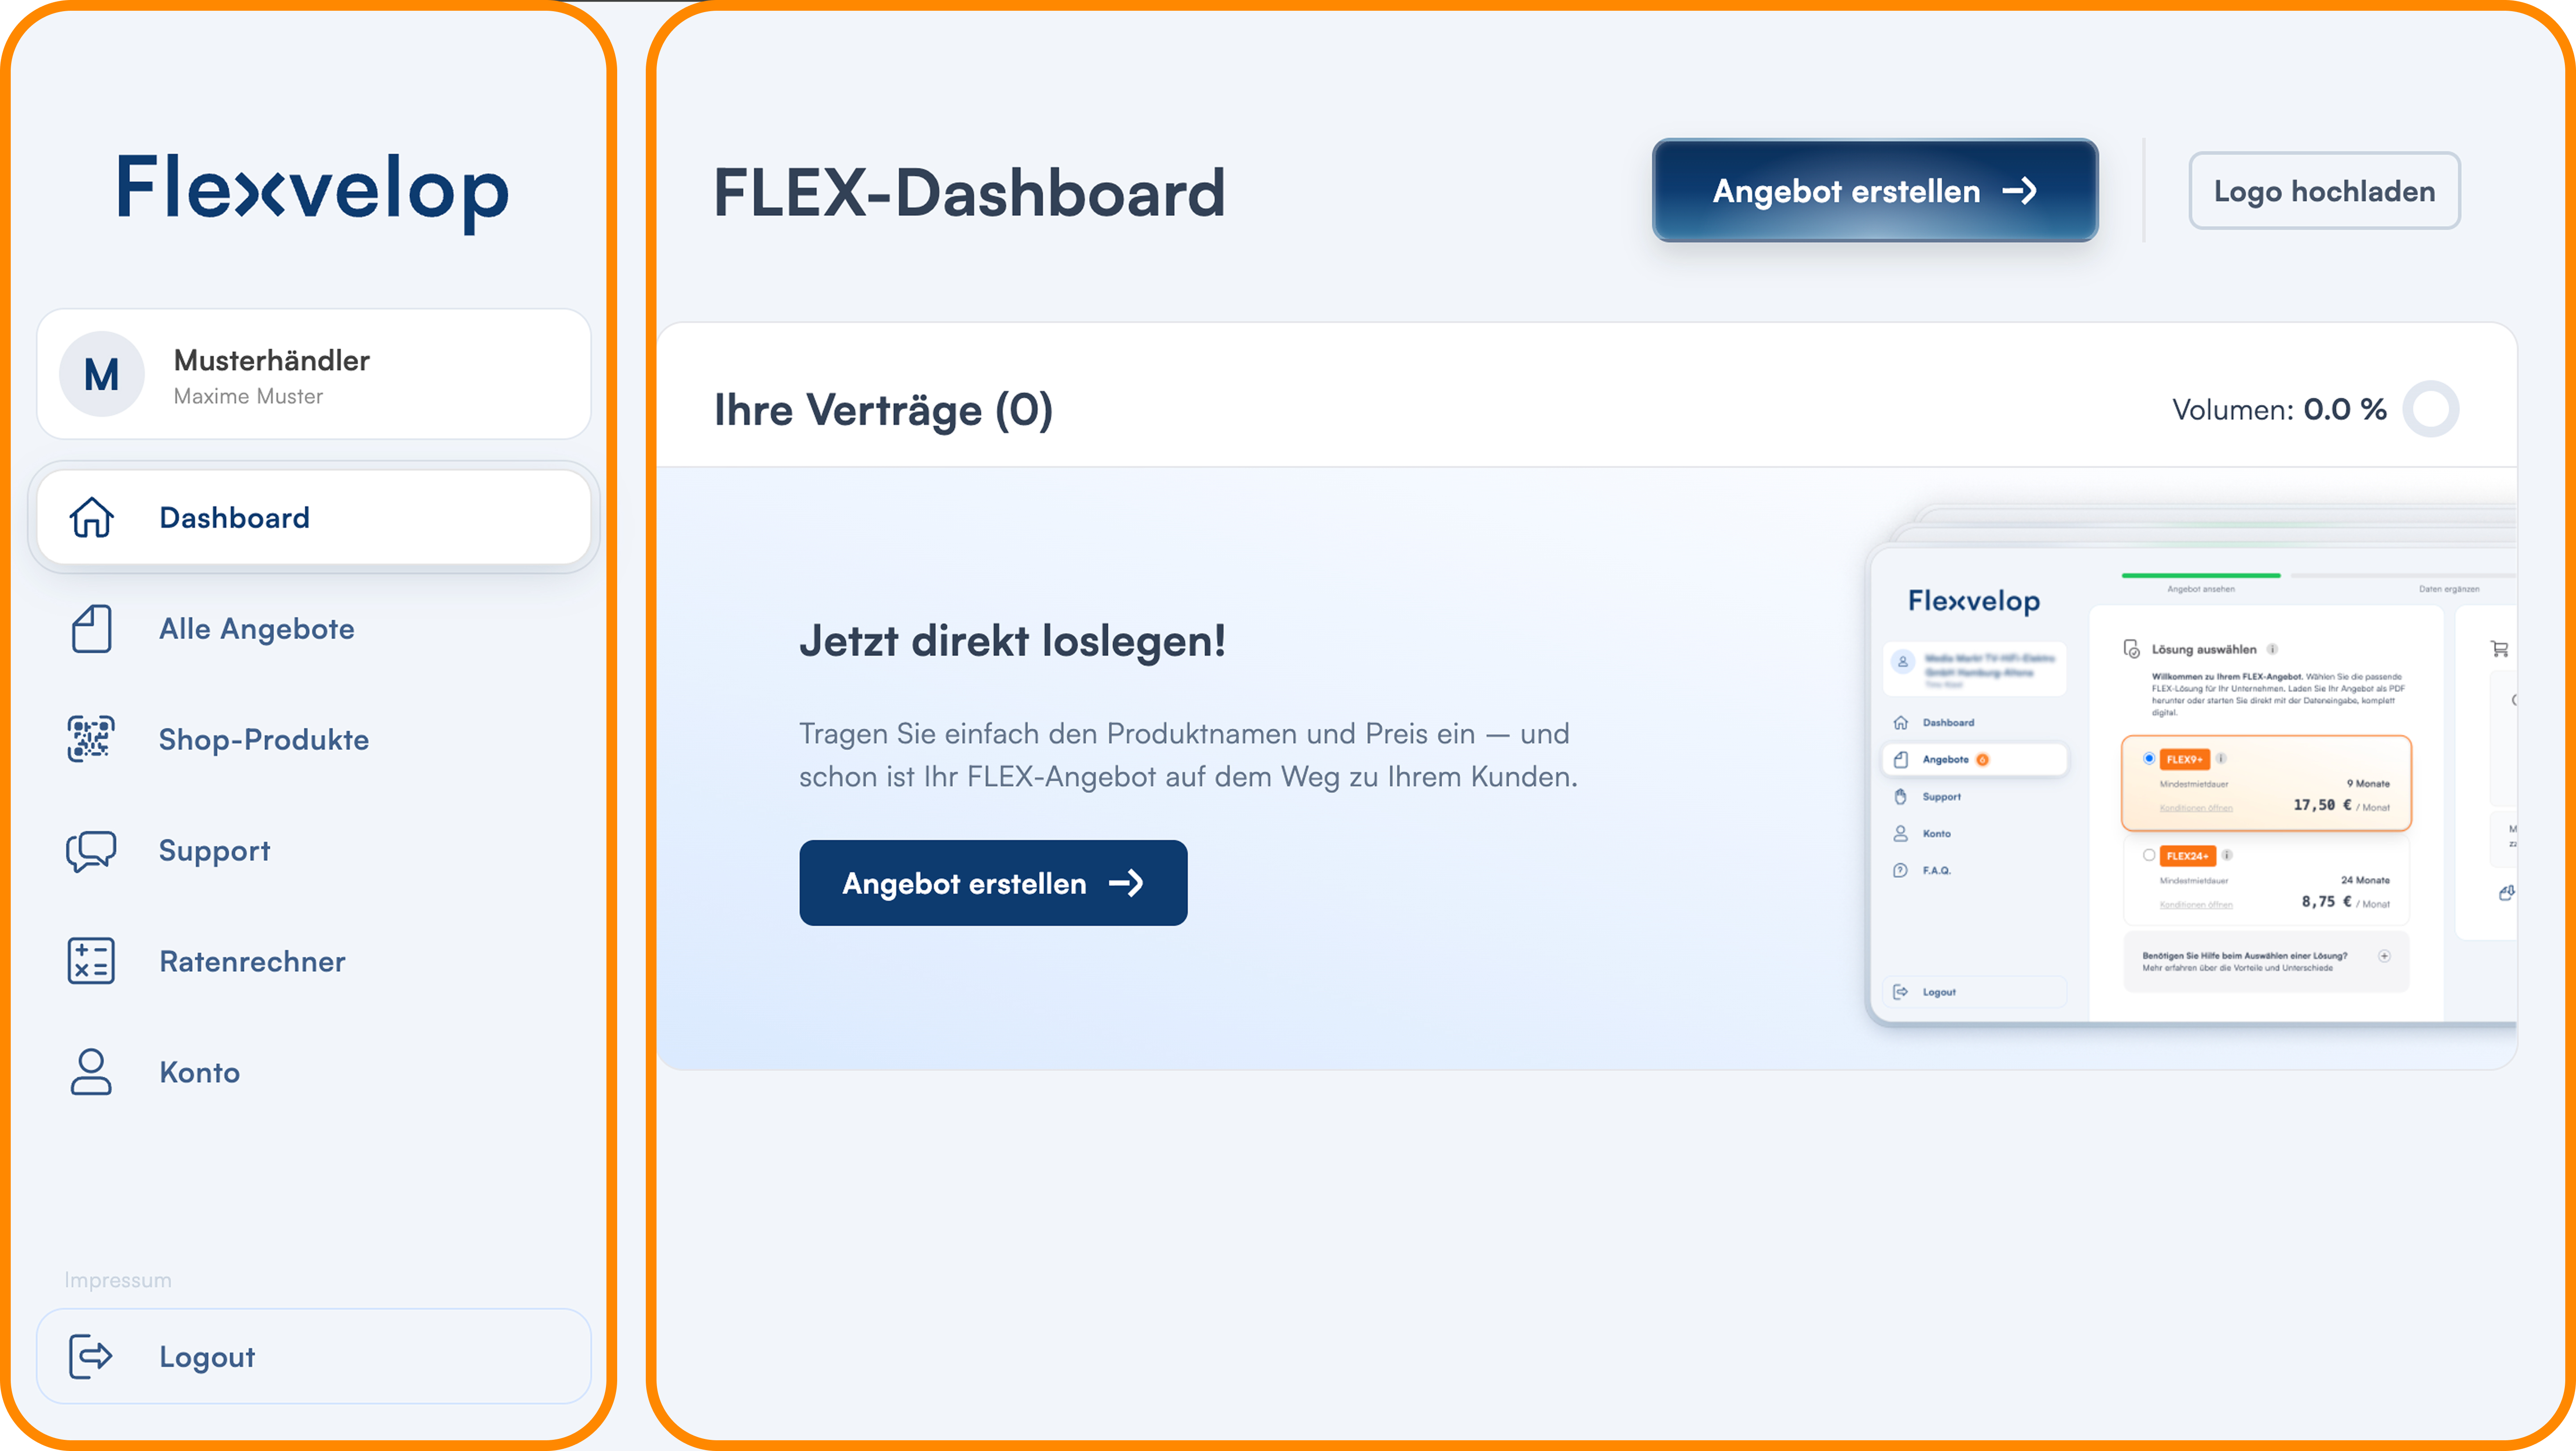
3. flexvelop dealer dashboard
You have already created your account and can send offers to your customers without any further effort.
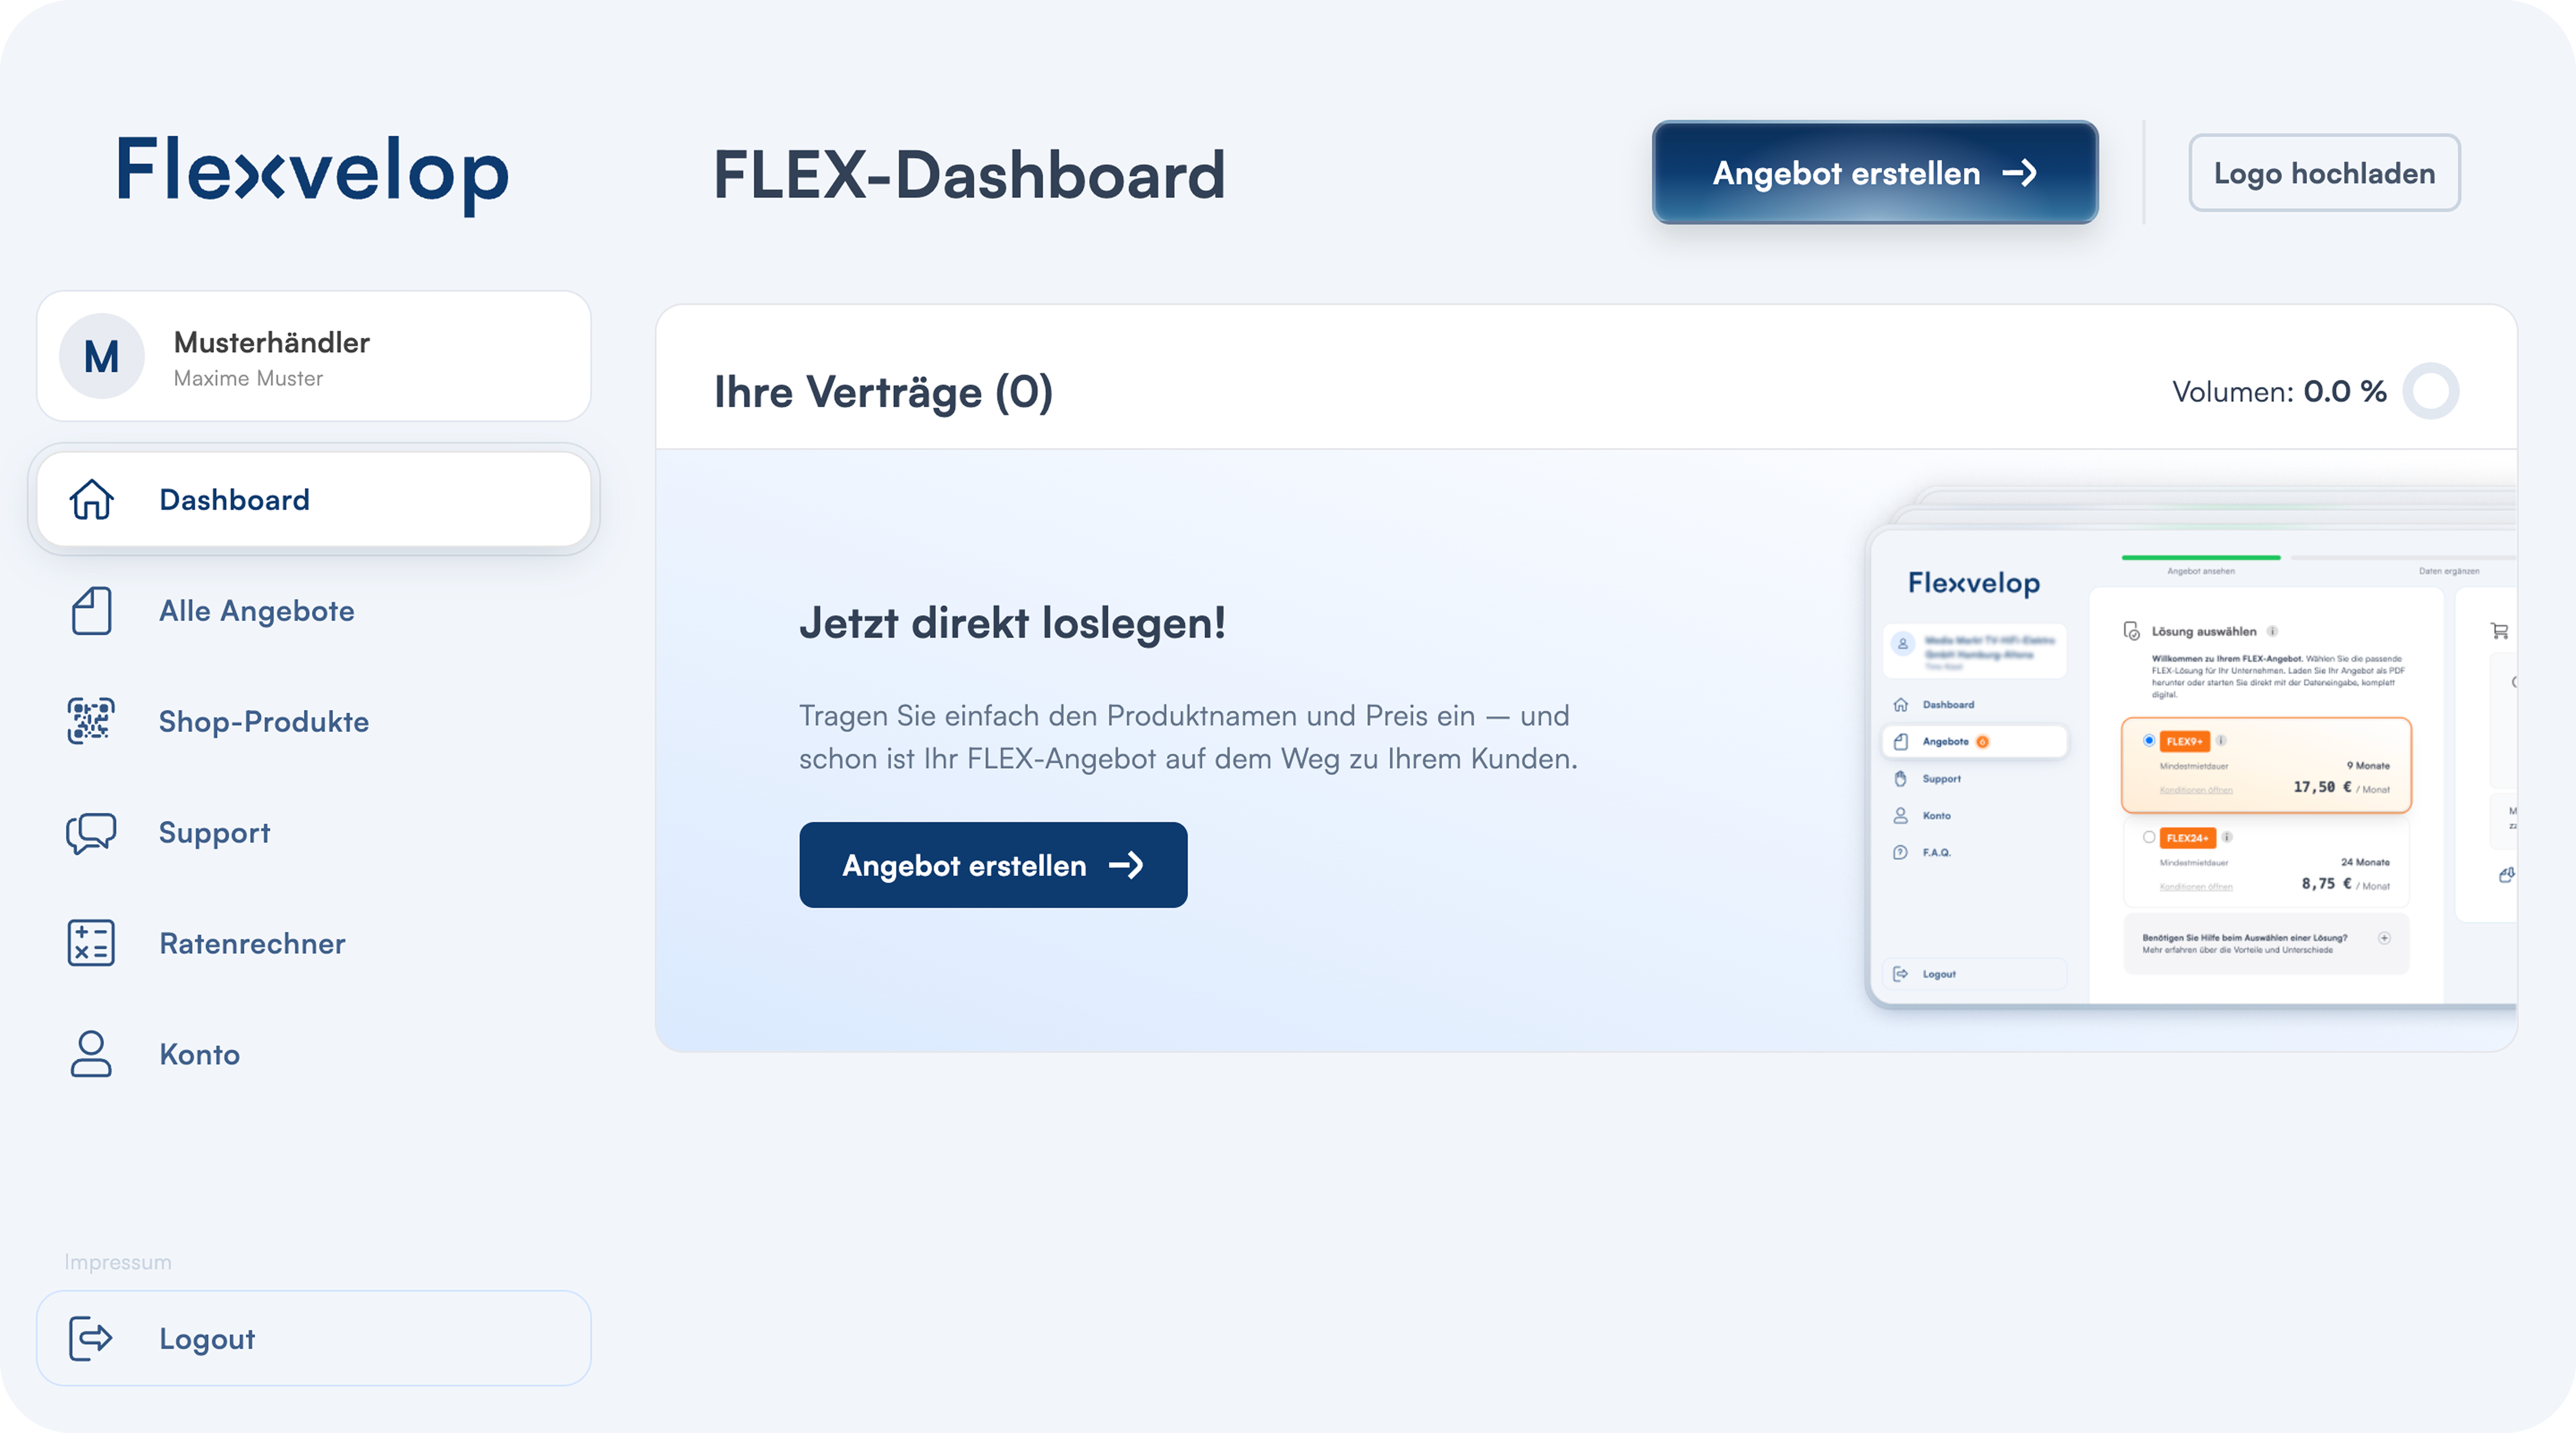
4. finding your way around the dashboard
The dashboard is always divided into two areas. On the left-hand side you will find the navigation bar, strikingly orange. On the right-hand side you will find the respective content of the page.
On the home screen / dashboard you will find all current contracts with your customers as well as the most important function: the "Send offer" button.
All information on sending offers can be found in the FLEX Hub under the heading "Sending offers" on the left-hand side.